|
I've now fixed the smoothing on the Train and started the texturing process! So far I've only really blocked out the main colours and materials so there's a lot of work to do but even just the simple colours makes a big difference.  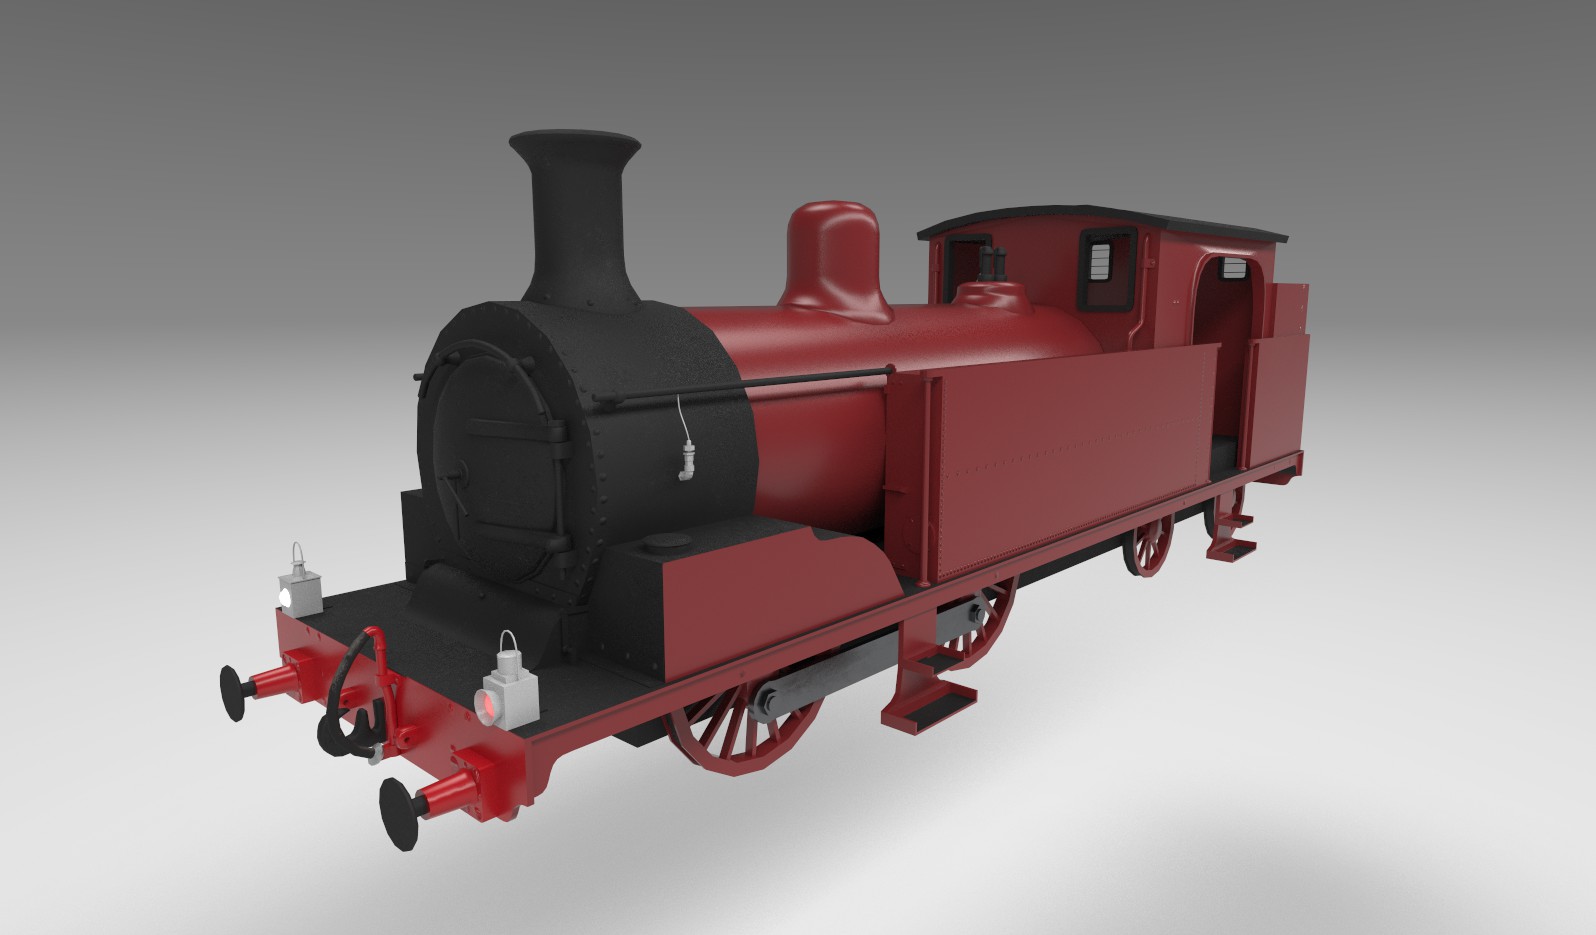 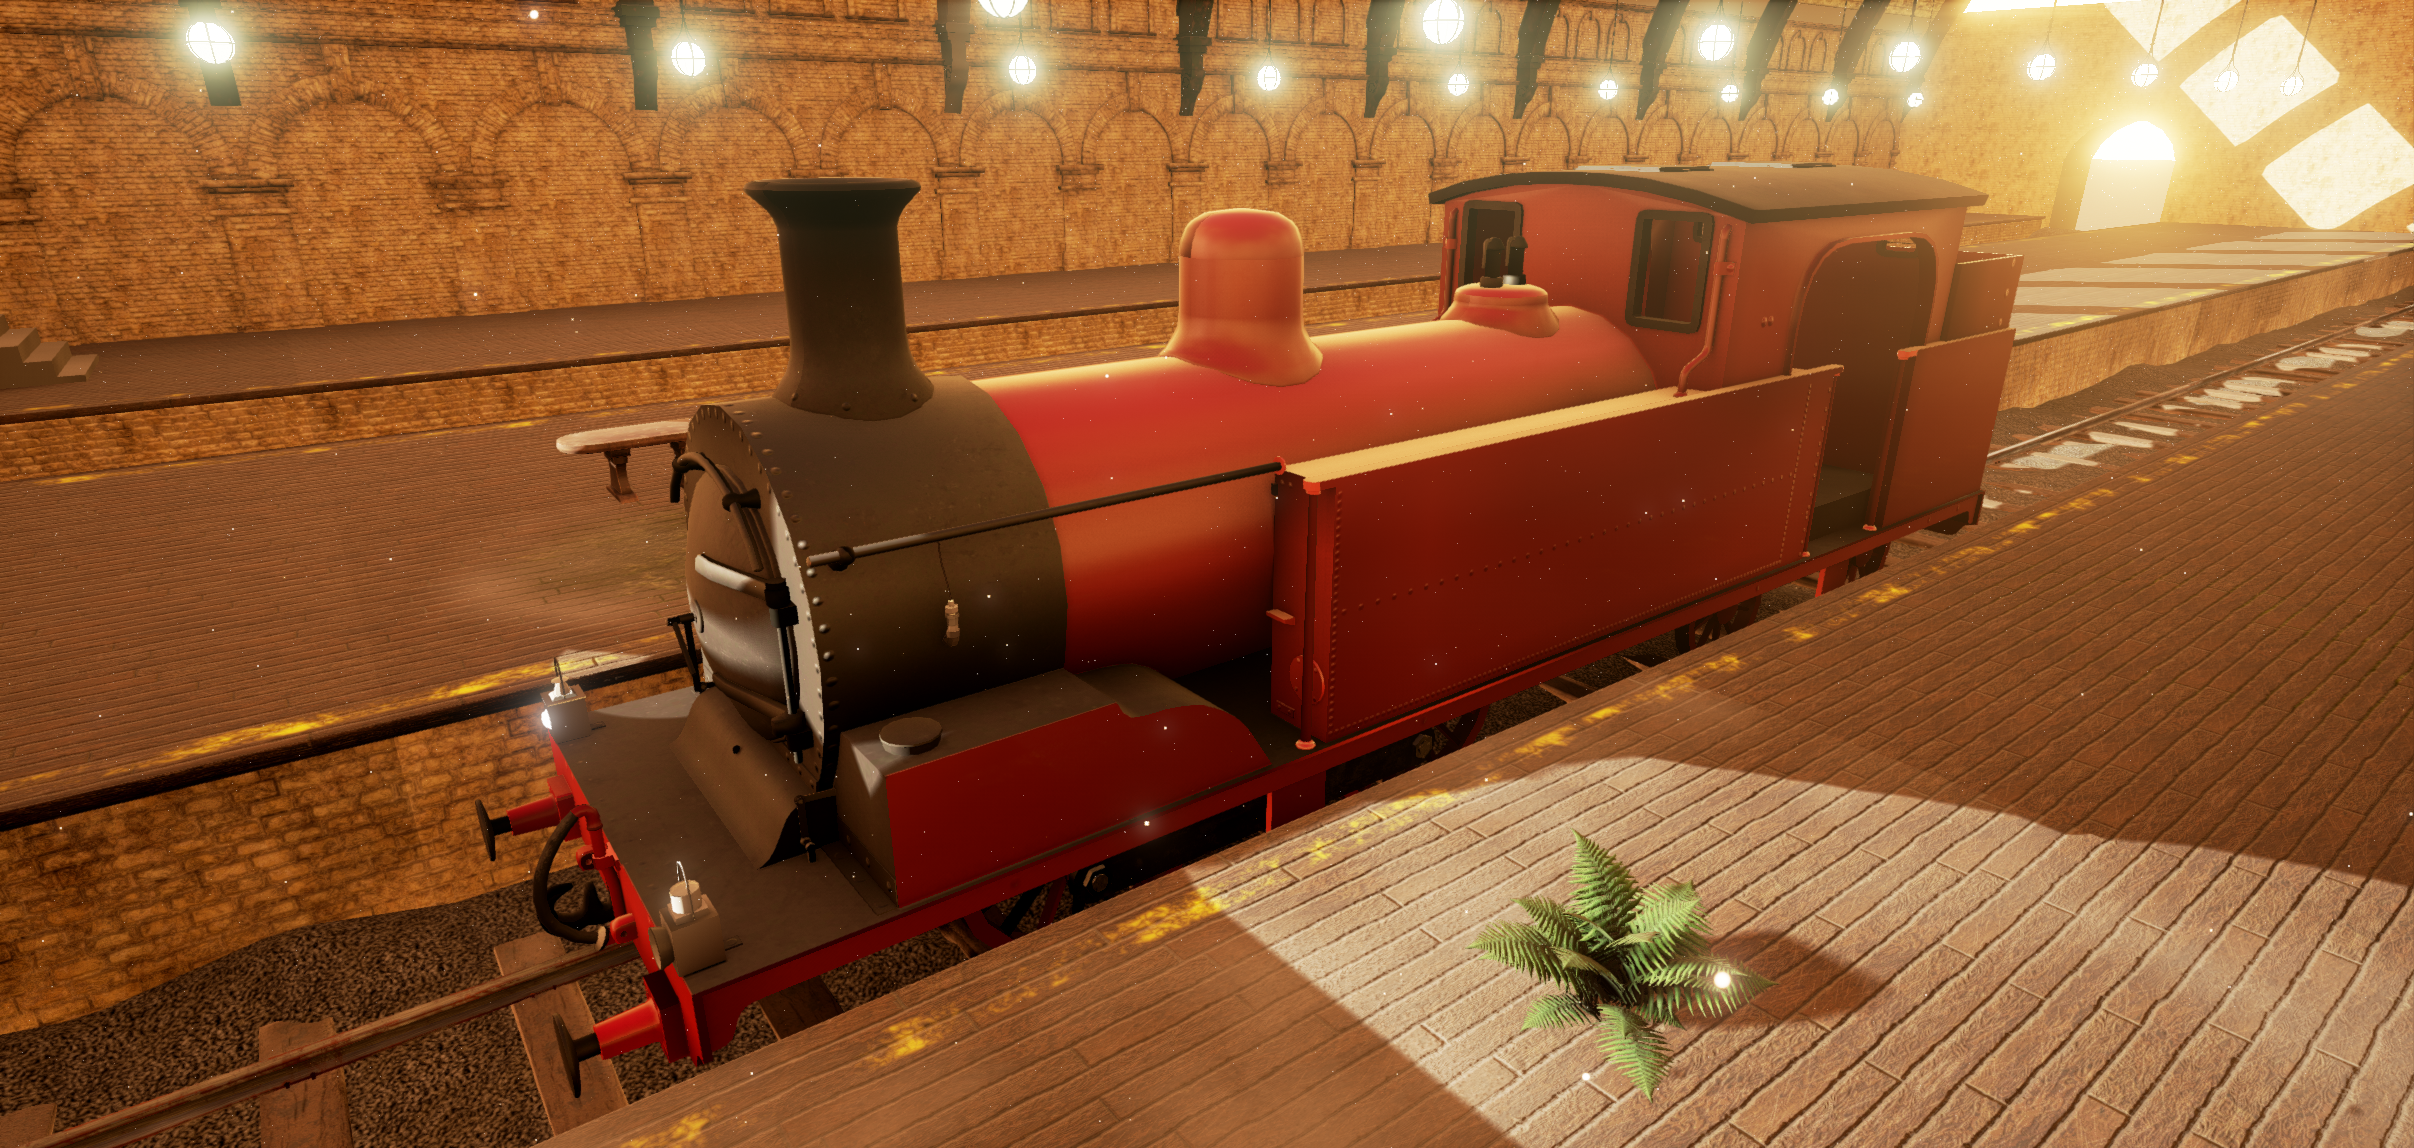 It was drawn to my attention that the top part of the station (area with the entrance, tickets/information boxes etc.) was quite empty and that I hadn't really done much work on it as I was focusing on the platforms and other important areas. So... I've started doing a concept paint-over of that section of the level and I have put a placeholder tiles texture on the floor as I definitely want to have patterned Victorian floor tiles on the floor. I thought about different ideas for what material the floor could be but in the end I decided on Victorian floor tiles as anything too plain like concrete could look quite dull and unappealing. By having these floor tiles it means there's some variation in the scene as everything around the platforms is quite grotty whereas I can have the upper station looking quite ornate. This will also show that I can create different kinds of materials. 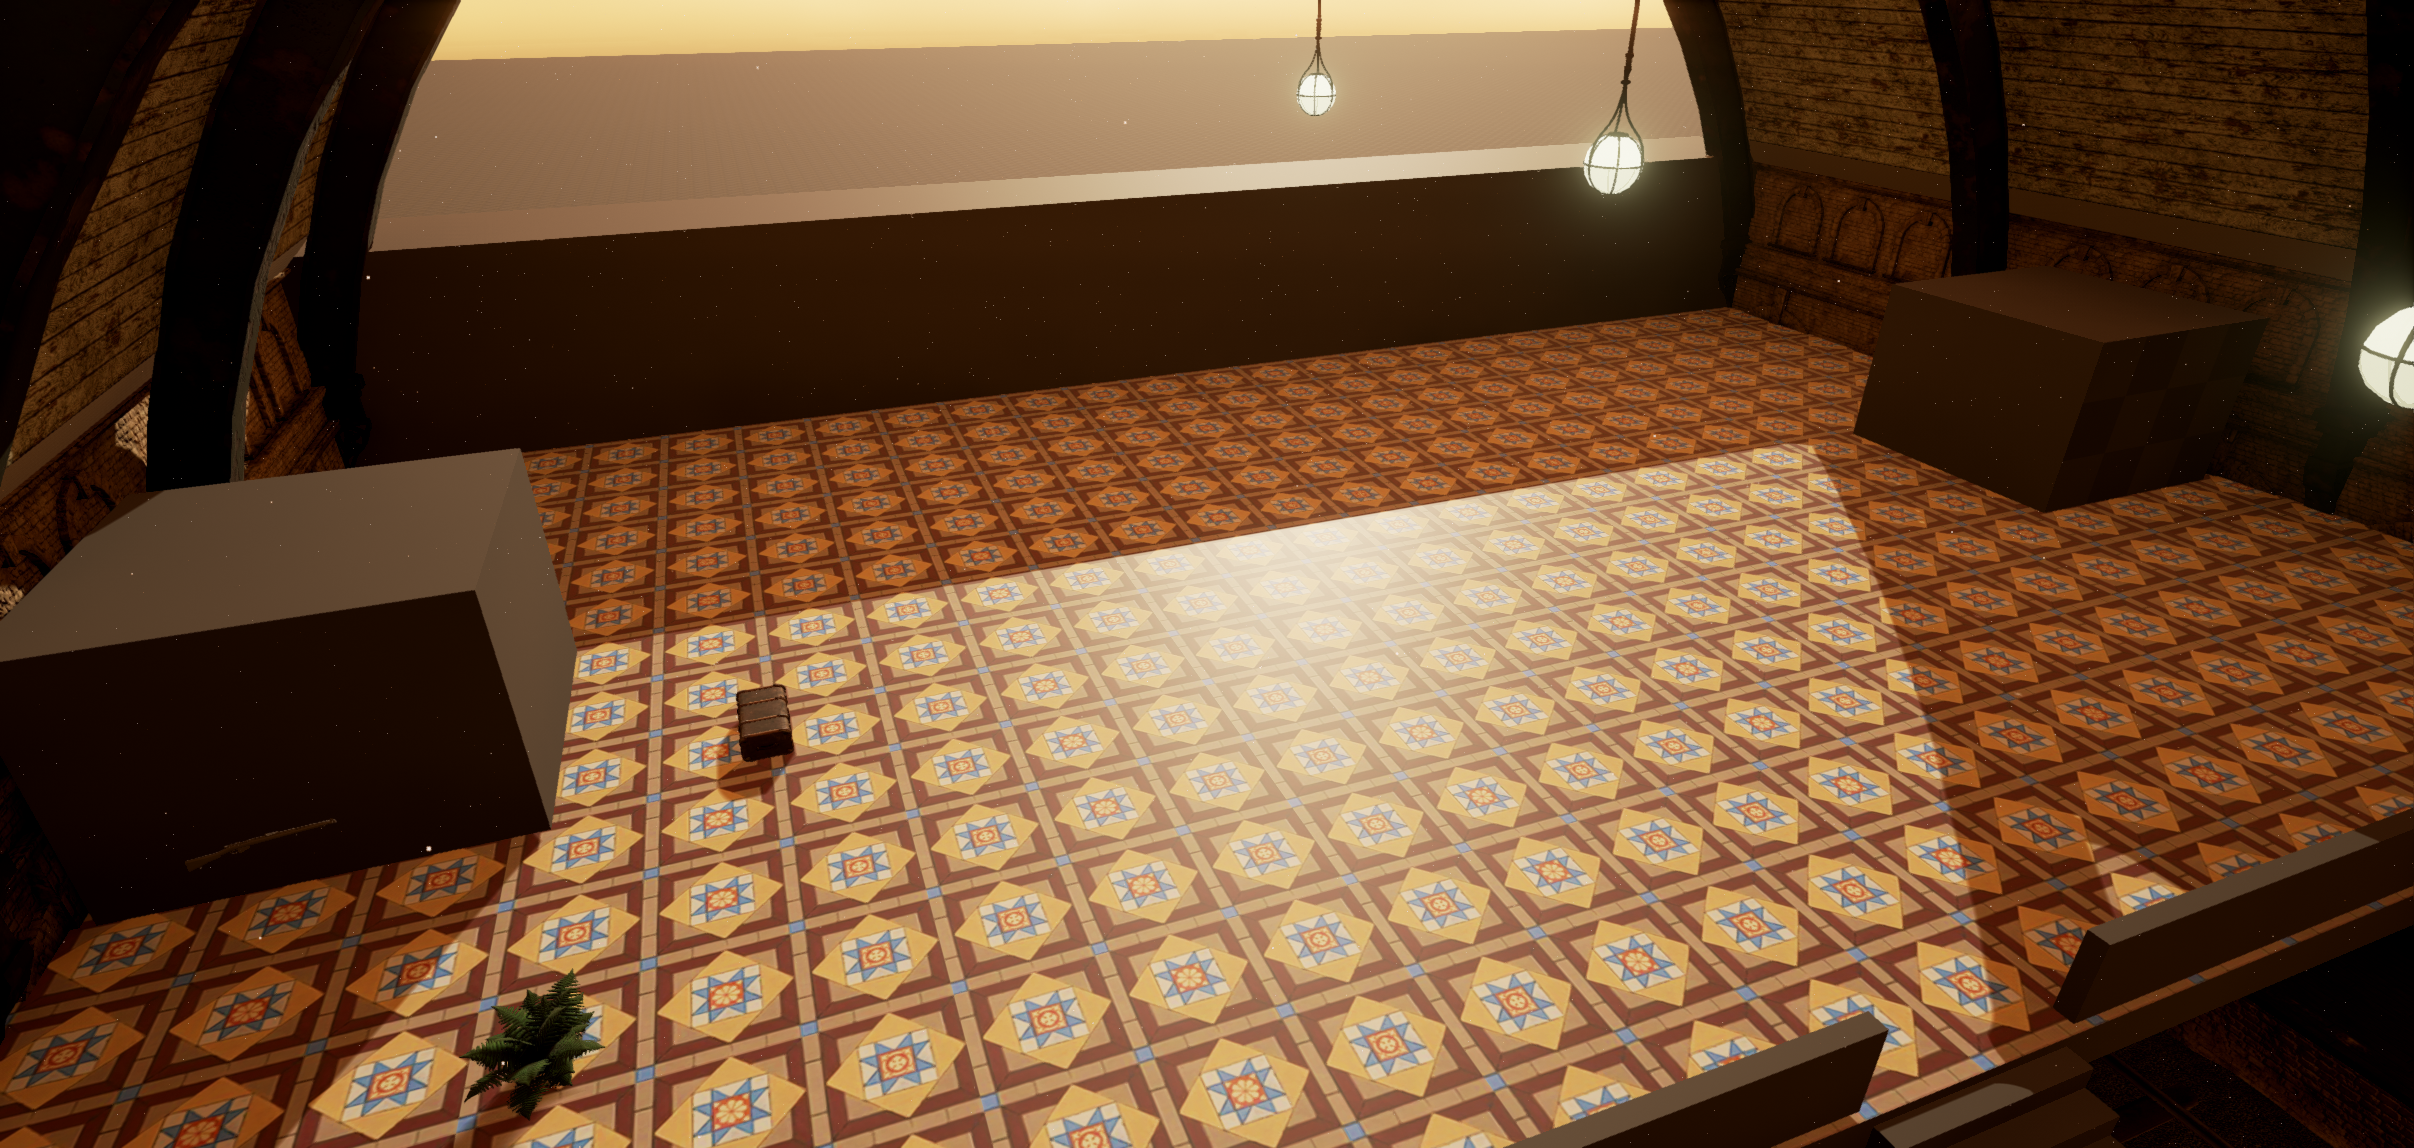 Knowing that I was definitely going to have Victorian tiles I created some in Substance Designer. Making them was quite a challenge as I've never created a material in Substance Designer as intricate as this! First of all I've never really experimented with shapes and combining patterns so I definitely learnt a LOT of new things while creating these! As you can see, there are three variations of the texture. This is because I want to have a material in UE4 that I can Vertex Paint onto my upper station area to break up repetition. 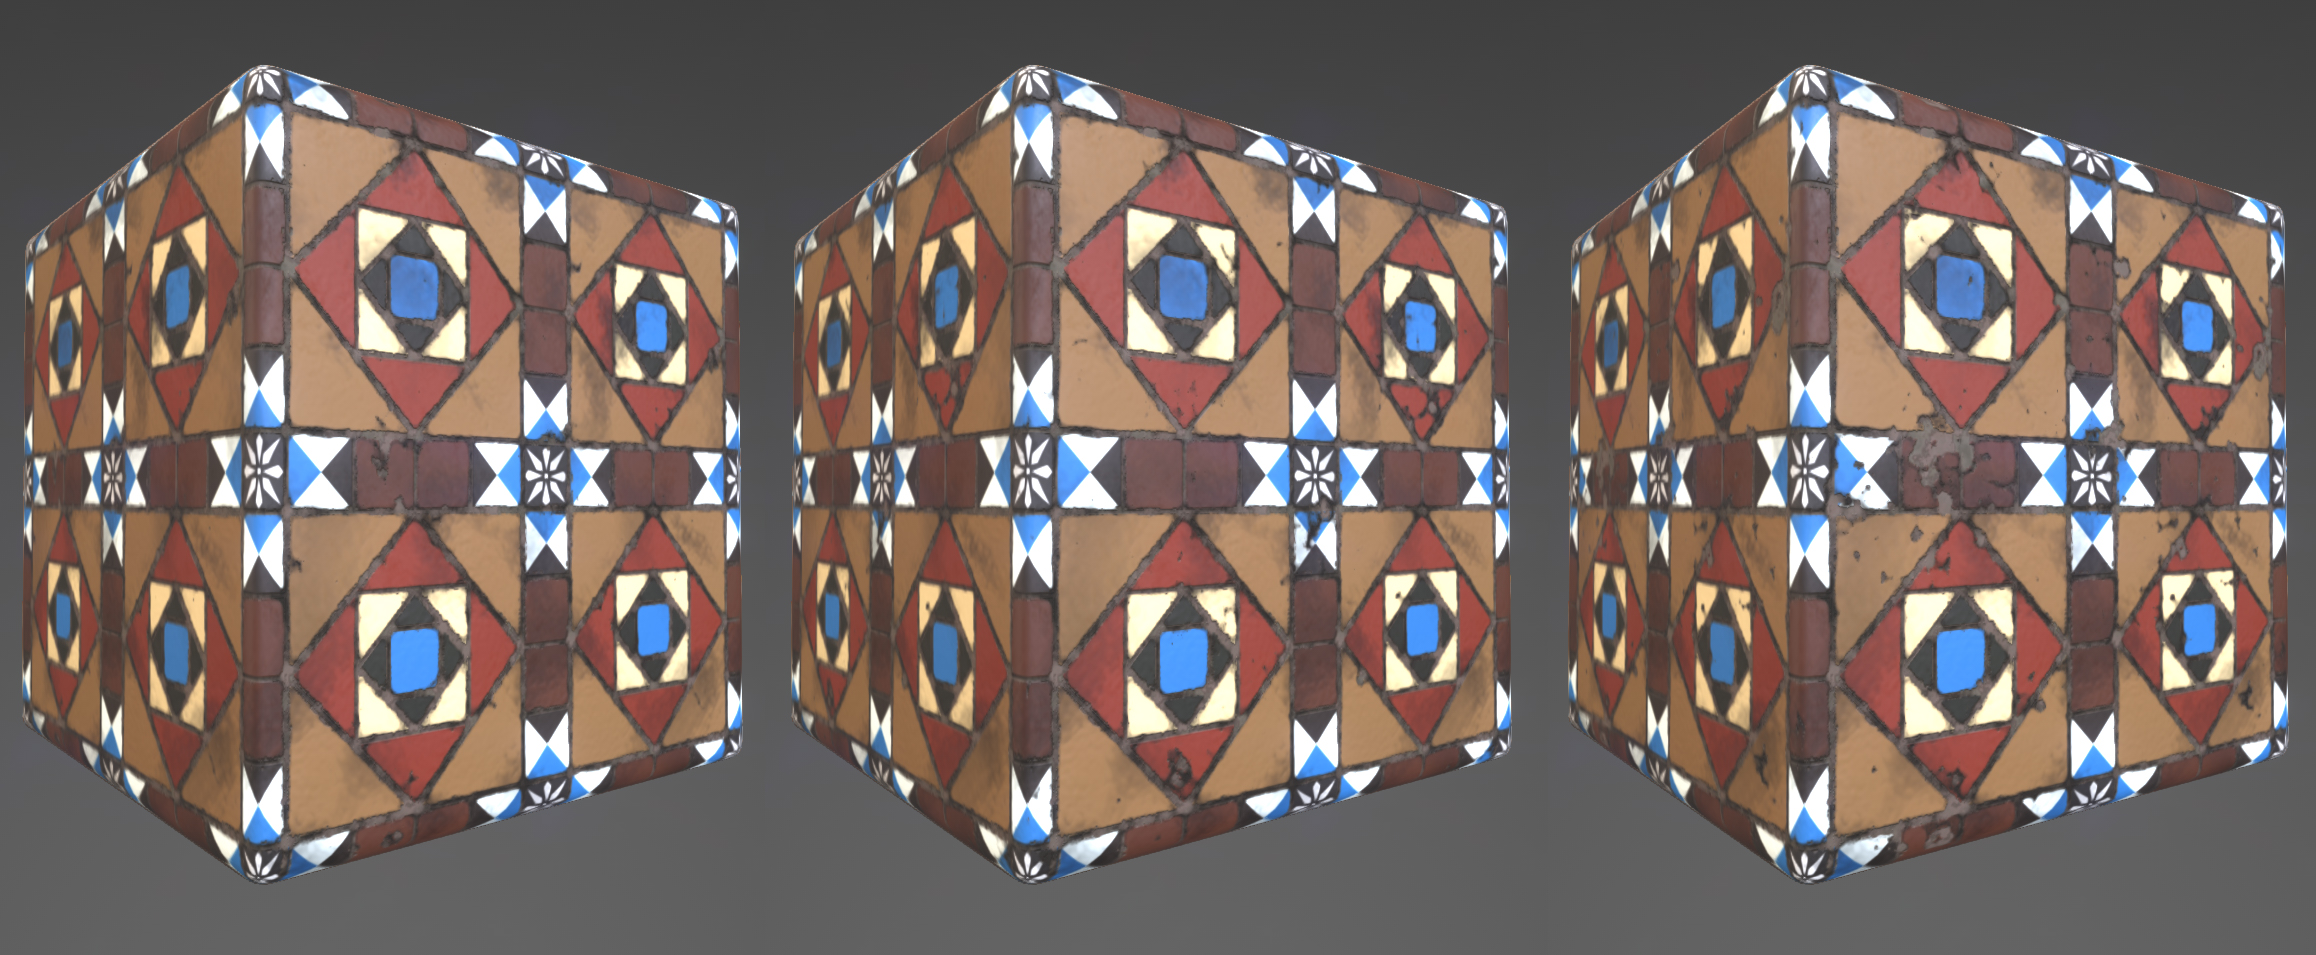 
0 Comments
Open finishing the Enfield Rifle I went back to completing the Train. I finished unwrapping the train and arranged the UV's onto two 2048 maps, ready for baking. I baked the details (bolts, coal and corrugated pipe) onto the meshes using a combination of Substance Painter 2 and xNormal and then merged the various normal maps together using the Normal Combine node in Substance Designer. The train is now ready for texturing! Although I need to fix a few of the smoothing groups on the model first. 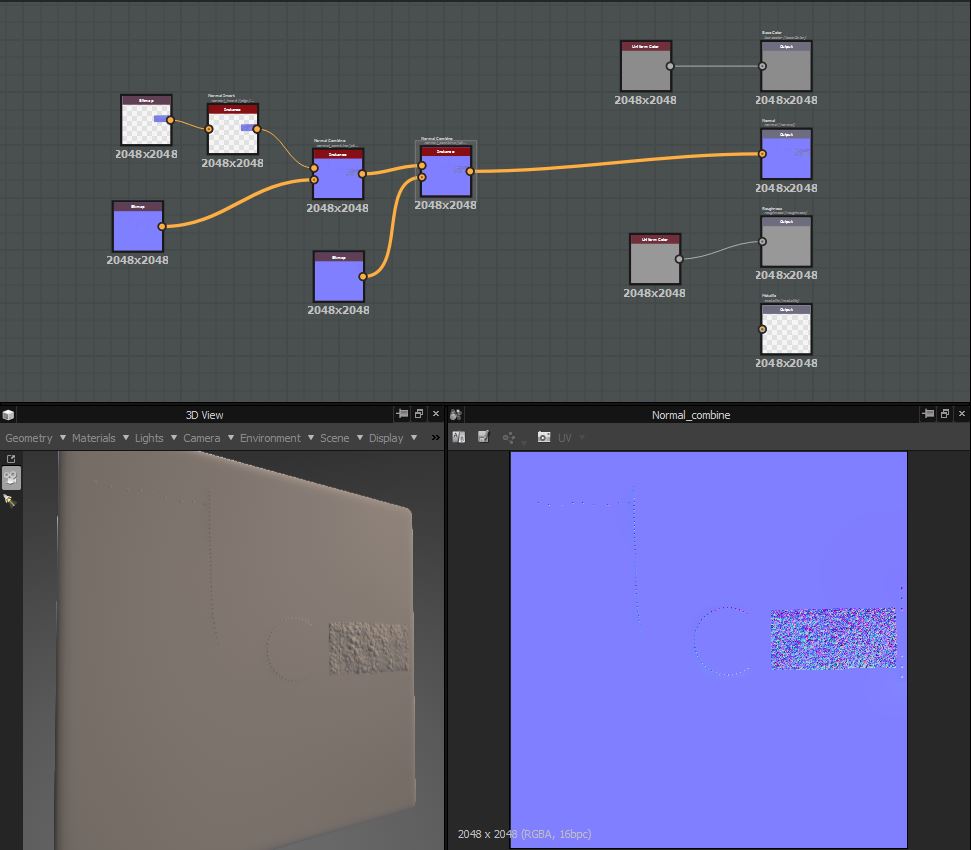 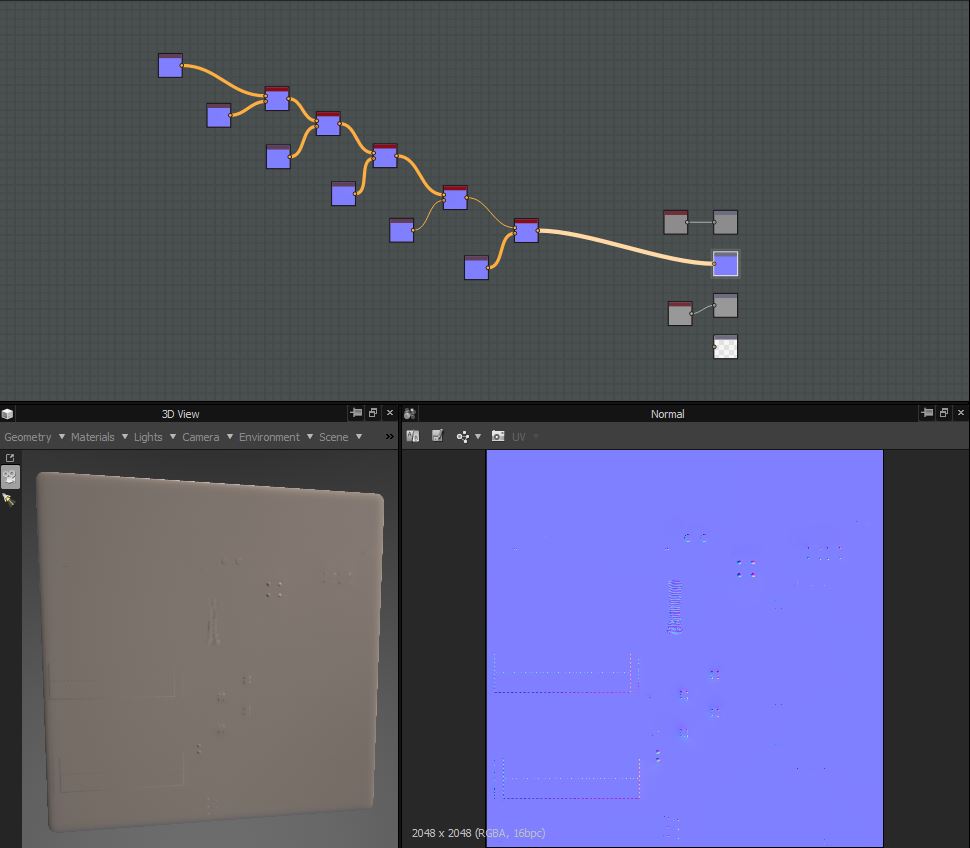 Over the past few days I have created some posters that I can put on the walls of my station. However after getting some feedback it came to my attention that they look a bit 'flat' and look like they're floating (not attached to anything). So I will have to make some boards or/and frames to attach them to and then attach them to the walls. Apart from that I'm pleased with how they look (the size was just a test so I can always make them smaller). 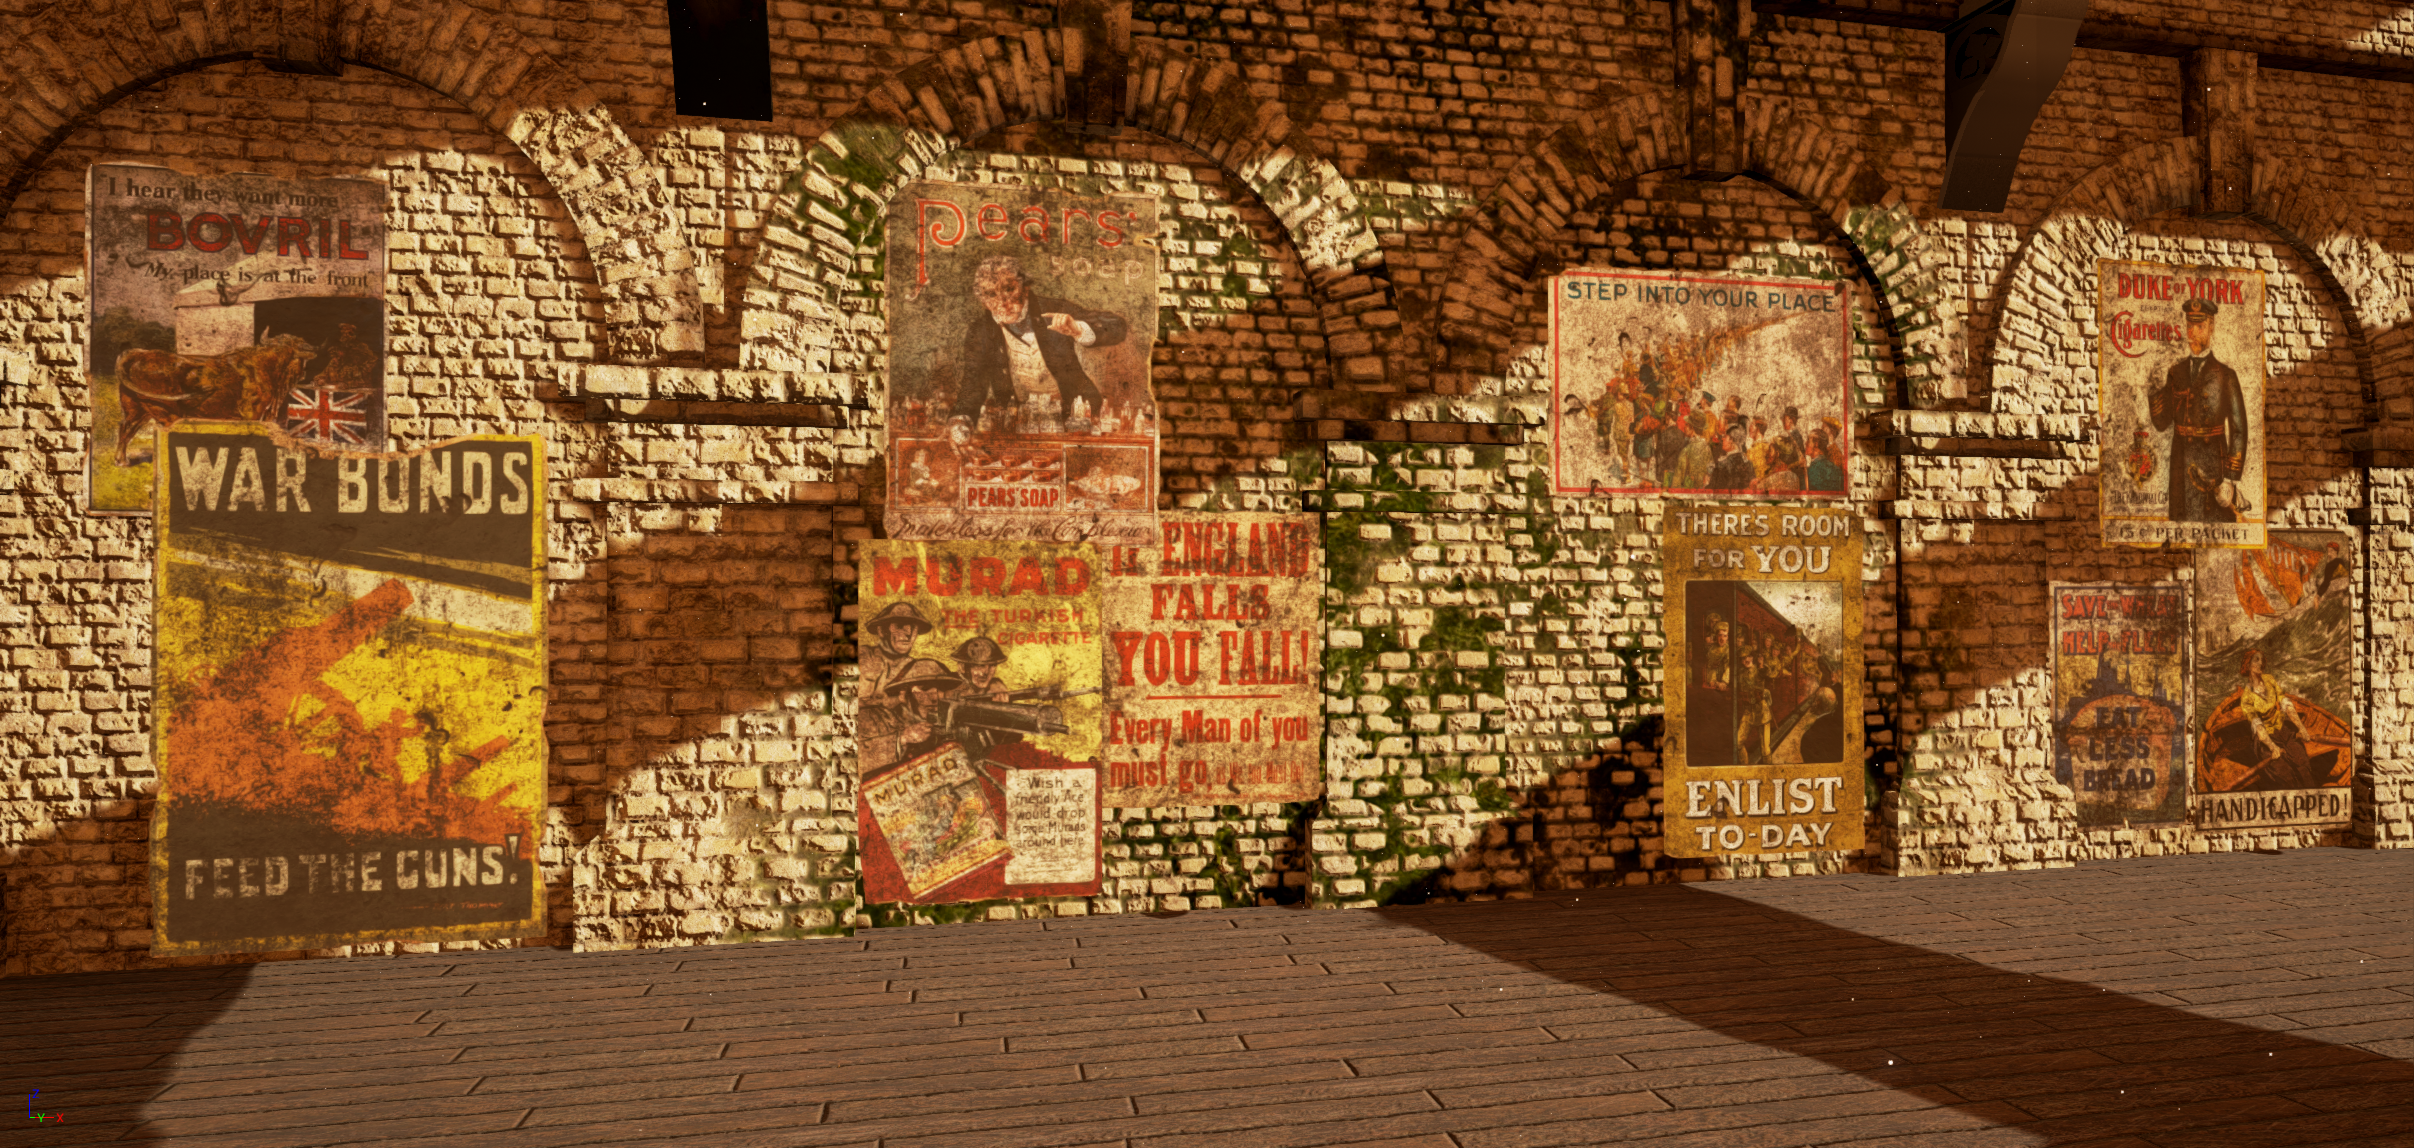 I've now finished modelling the Enfield Mk III rifle! I'm really pleased with the result and it definitely looks like the iconic weapon. It was quite challenging to model as there were quite a lot of difficult/technical mechanical shapes to model but I gathered lots of reference images and used the video below to accurately model the weapon successfully. 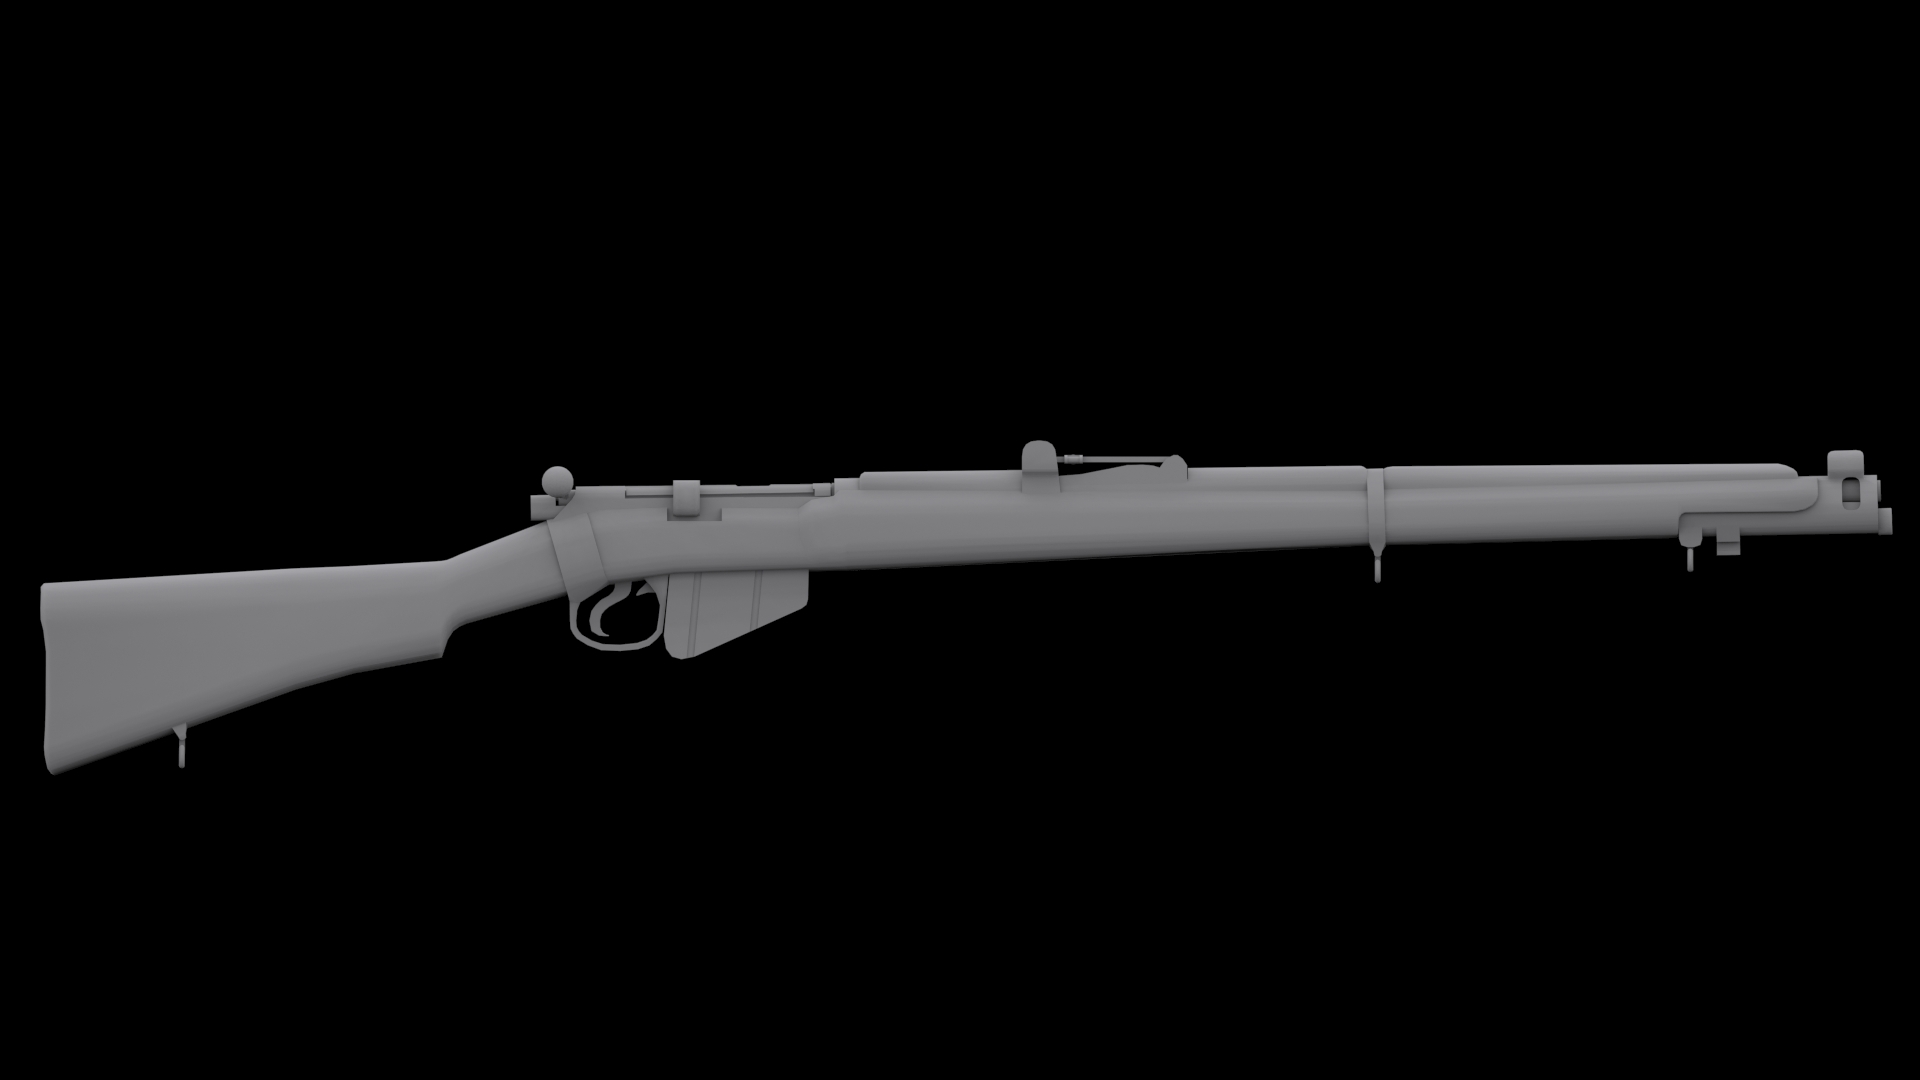 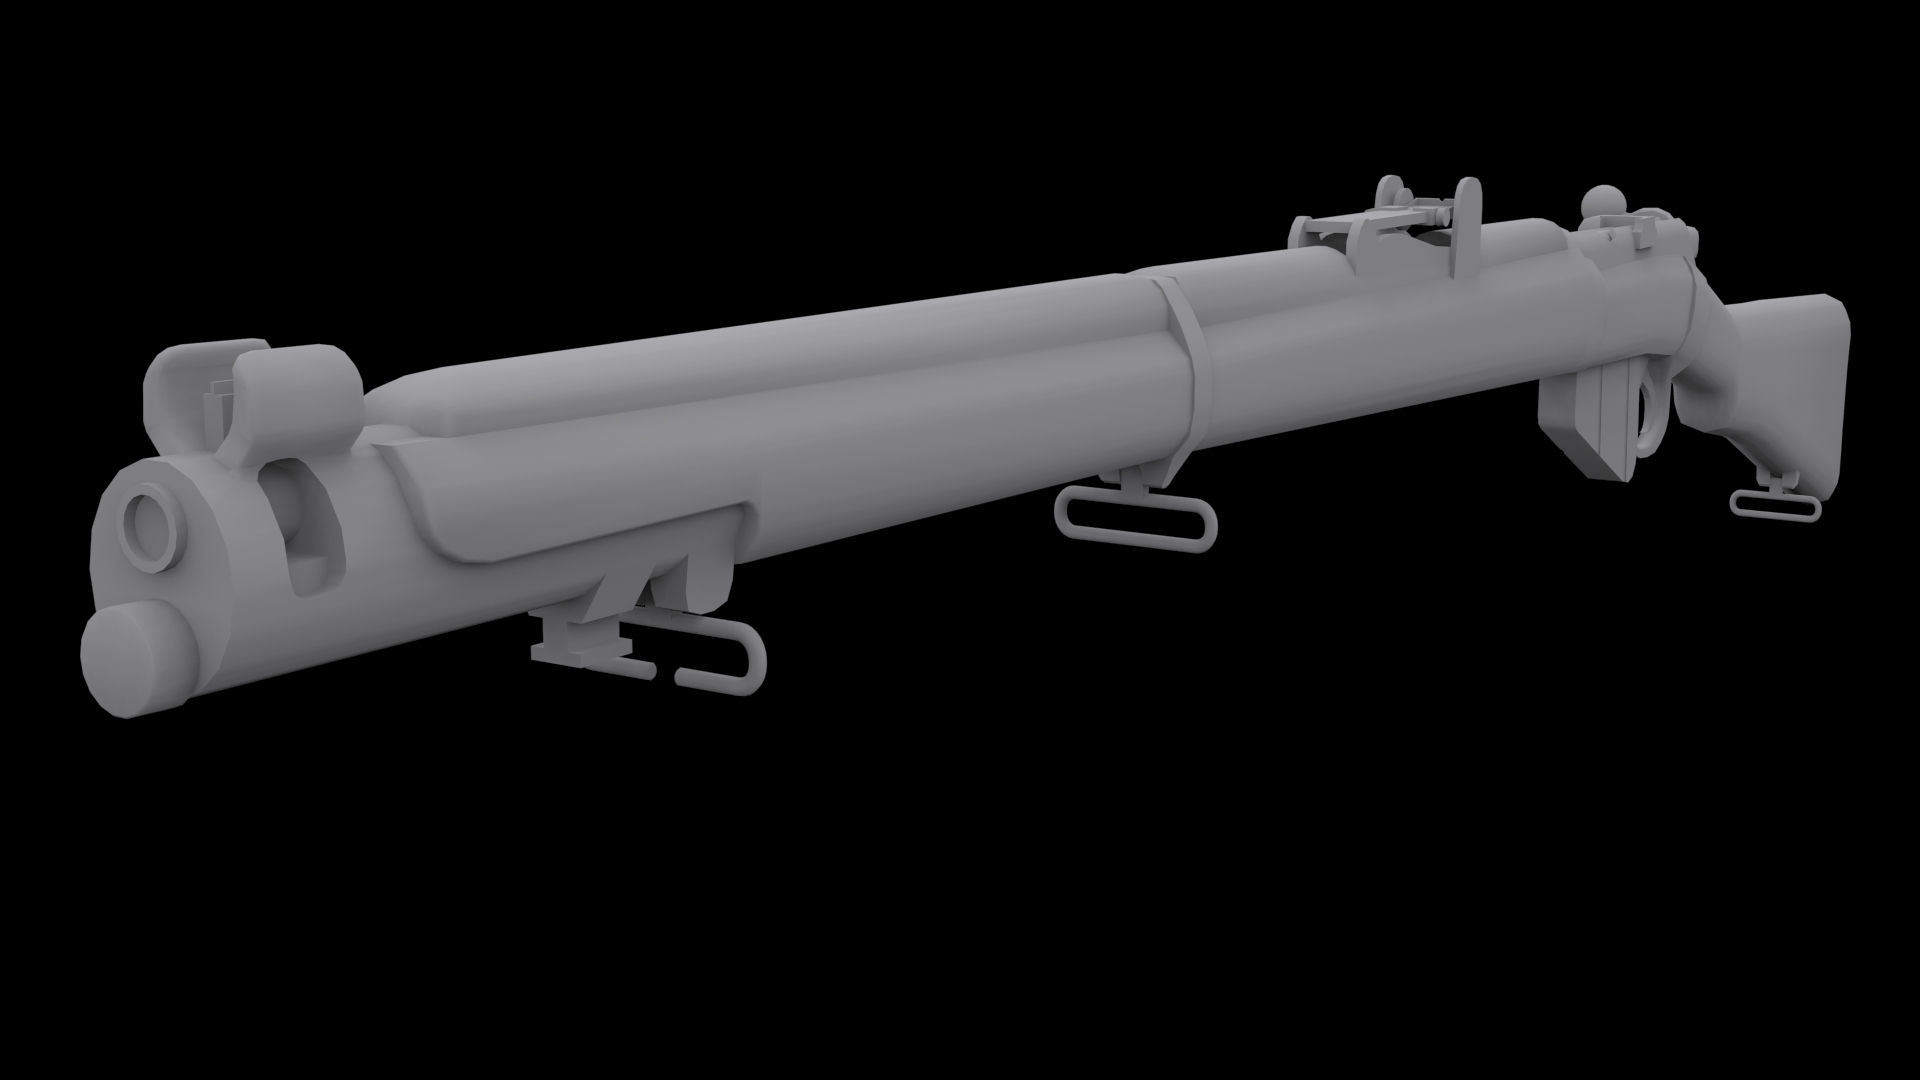 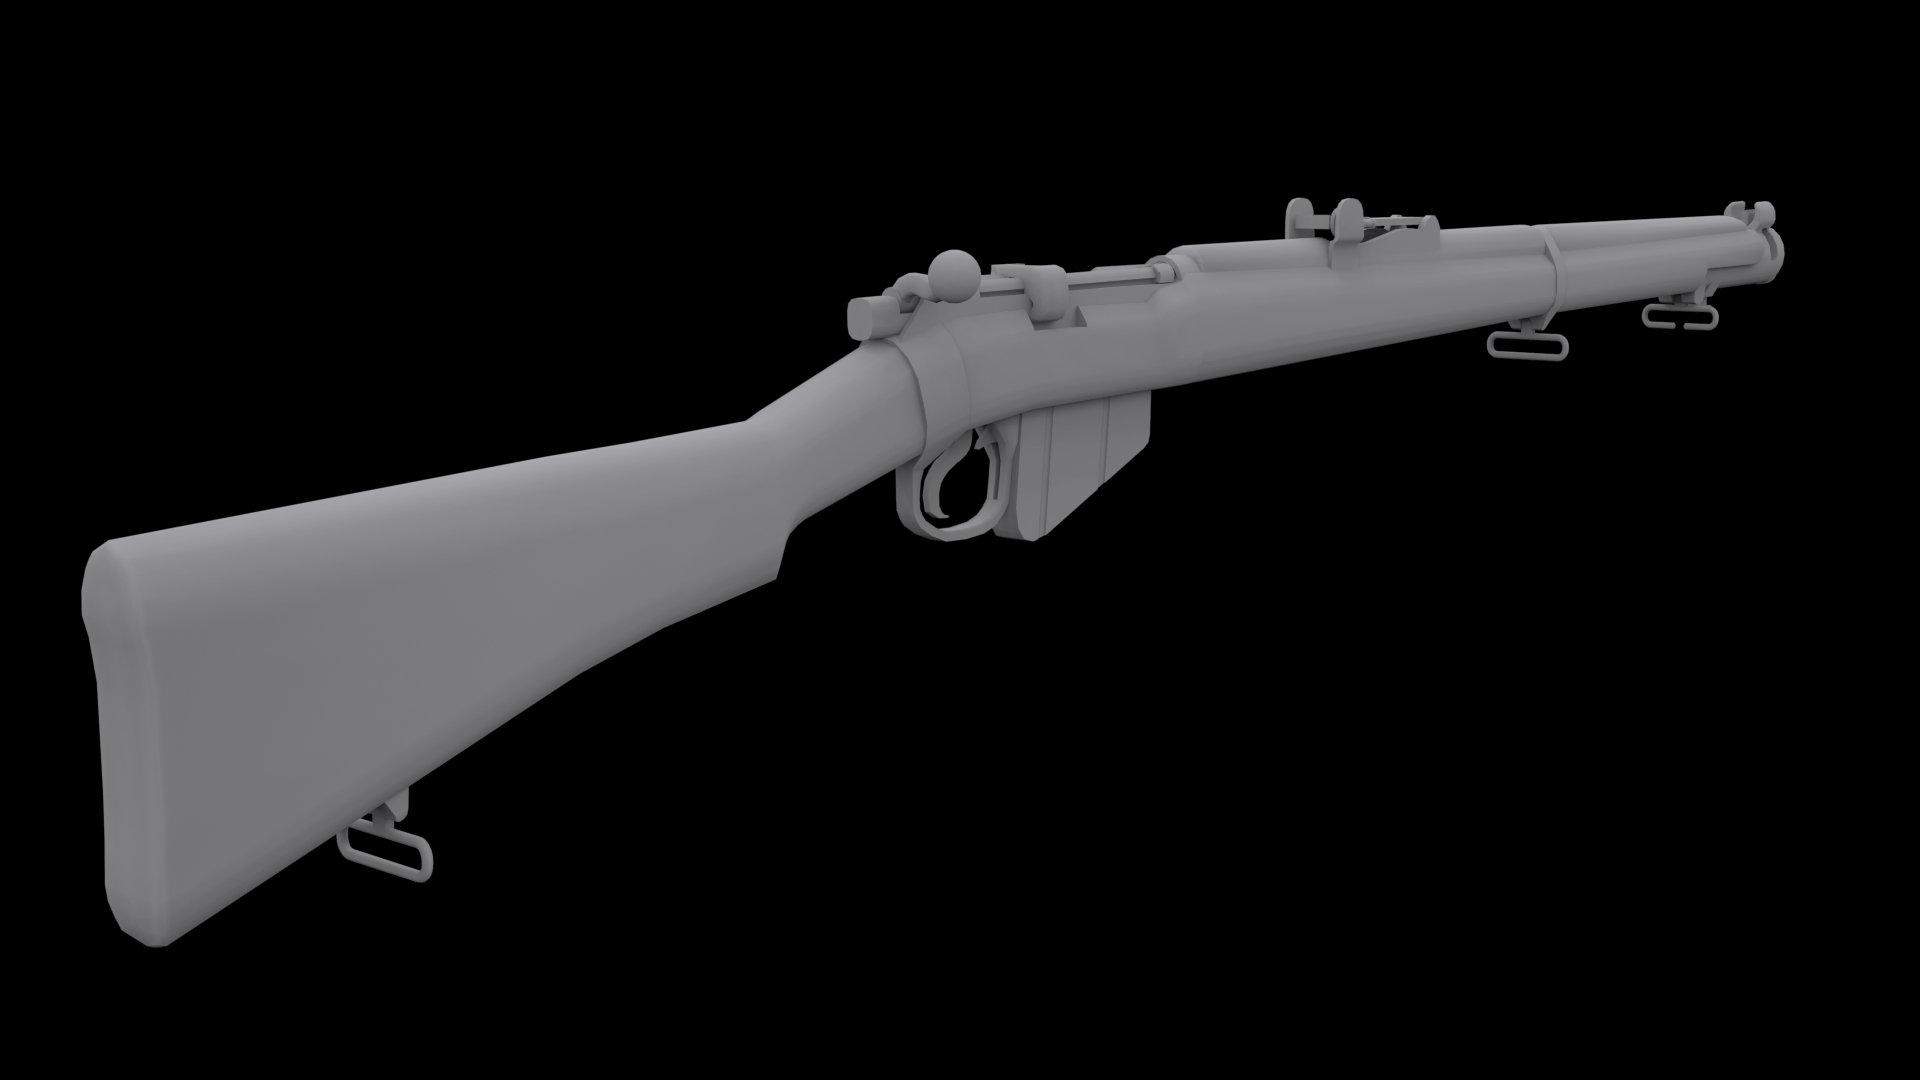 After having various people say that I should sort out my lighting I decided to just completely revamp it to match the sunset from my concept art. I'm really pleased with the outcome so far as I had to do quite a lot of tweaking on the default UE4 sky to get the effects I wanted. Although I'm planning to create some light shafts, just changing the sky has already made the dust motes particle system more visible and it's made them look better! I'm planning to create two variations of my scene involving different weather conditions based on my concepts; a sunset variant (the one I'm currently working on) and a rainy, gloomy variant (which I will work on once the whole level and assets etc. is completed). 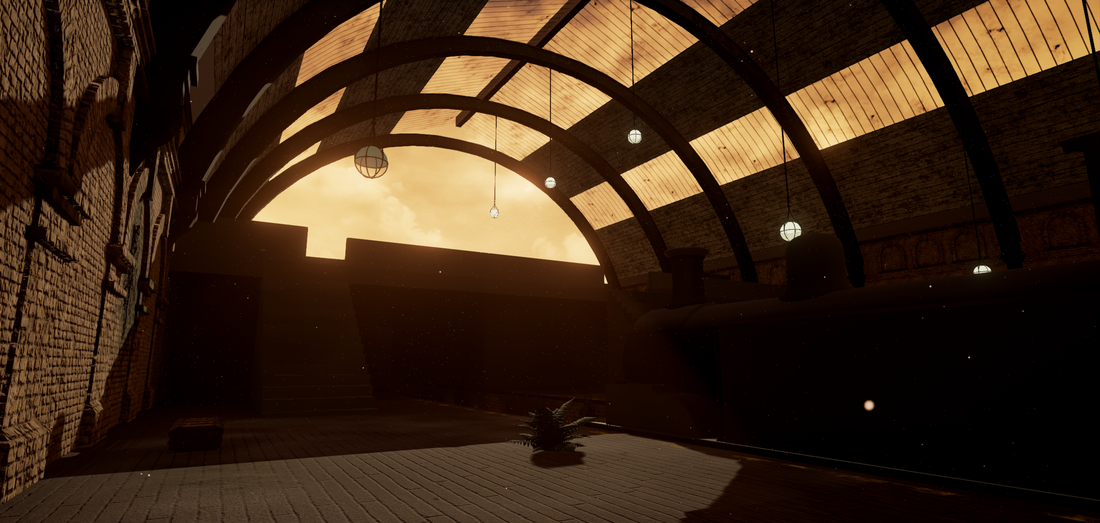 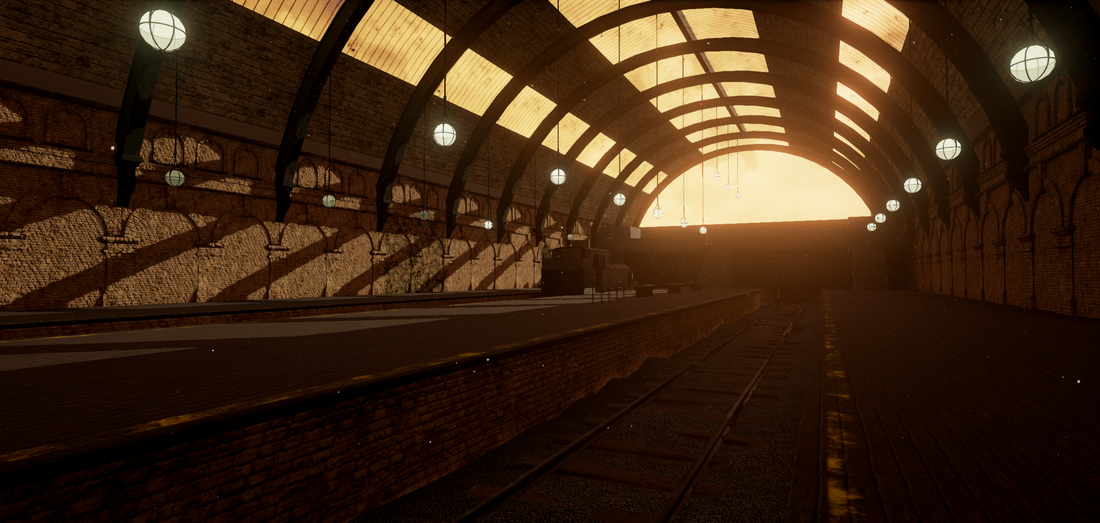 Having been working extensively on unwrapping the steam train I decided to take a little break from it and start modelling an Enfield rifle (specifically the Mk III) to replace the placeholder gun in the First Person Blueprint in UE4. This is all to do with the storytelling element that I explained a few blog posts ago to do with the idea that you play as a British soldier after WW1 has finished, patrolling London to make sure it's safe for civilians to come back to London. I've managed to implement the model (work in progress) into UE4 and get it working with the First Person Character blueprint and I plan to make my own arms/hands in the future. 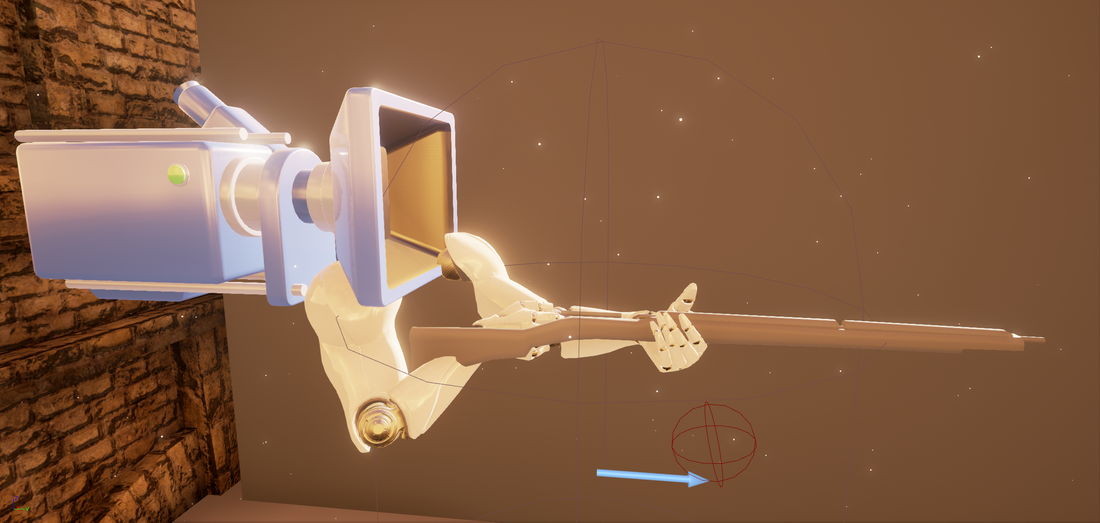 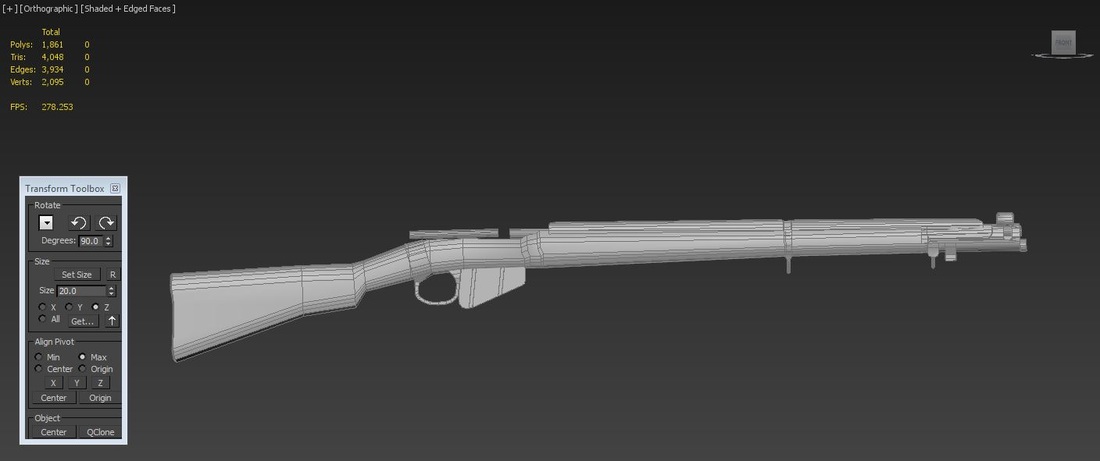 I decided that the lights in the scene were not bright enough so I brightened them up a bit! I've also now textured the hanging lights using a mixture of Substance Designer and Painter. The video below shows the dust motes particle system I've created that fills the entire environment. It took a bit of tweaking to get it right because if I made the particles too small they were impossible to see and if I made them too big they looked like fireflies. Meanwhile I've been unwrapping the low poly steam train and I'm nearly done so should be able to start texturing/baking soon! 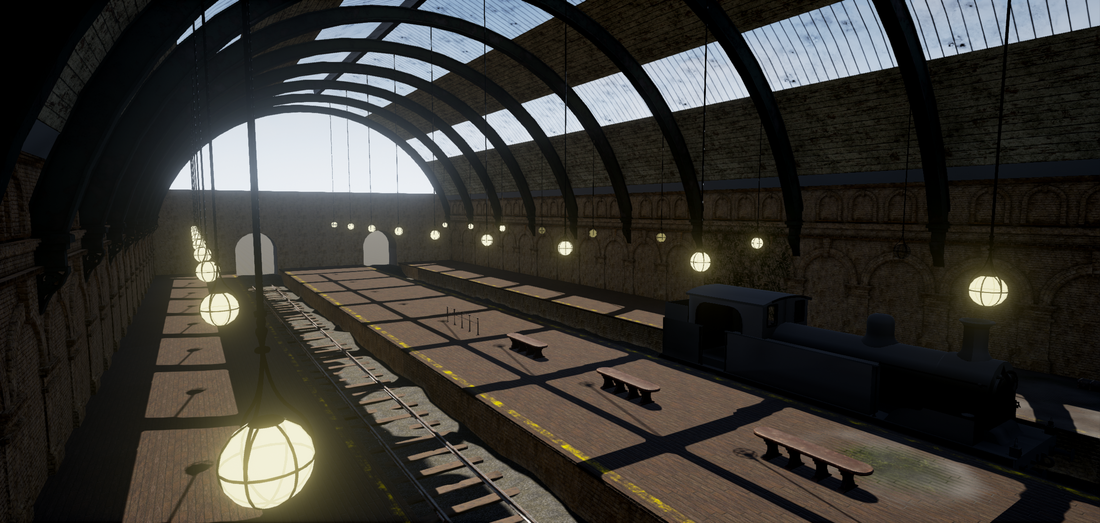  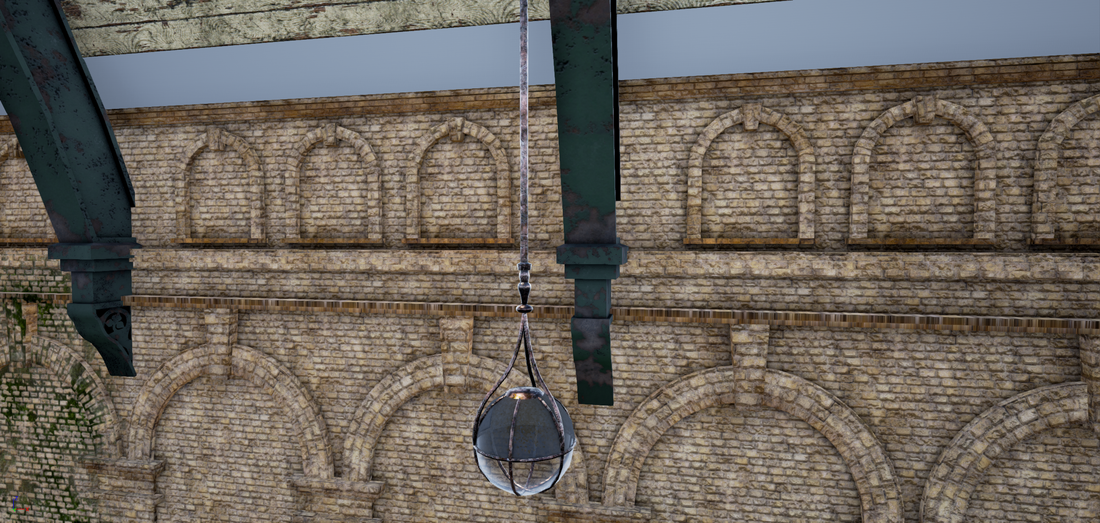 Using Substance Designer I've created a dust texture and implemented it into my platform materials so that the dust can be vertex painted onto the wood planks as well as the moss and still utilising the height map. It took a little while to figure out how to get the opacity of the dust material to show when I vertex painted it but I eventually worked it out! I'm not sure if the dust texture needs altering a bit but I'll get some feedback and go from there as it wouldn't be too much trouble to change the substance in designer and then reimport the textures.  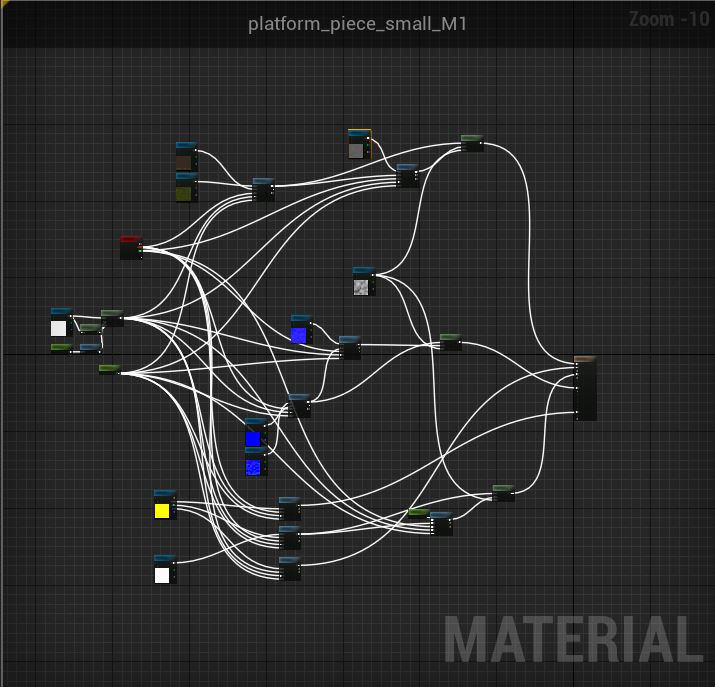 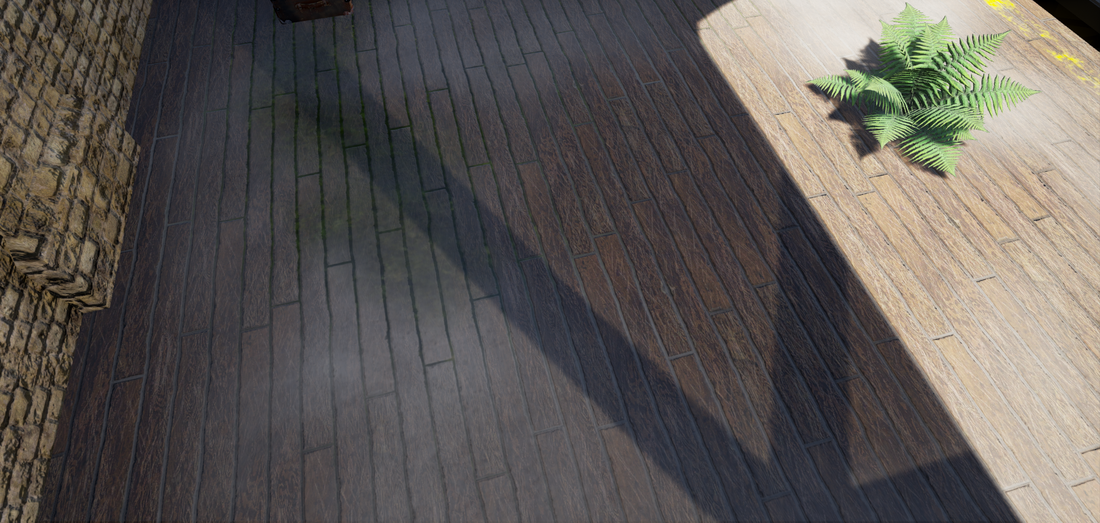 I've finally got round to starting on the texturing of the hanging lights having unwrapped them a few weeks ago. At the moment the only bits I've worked on are the glass parts and the emissive map which are now done. Although I managed to get the emissiveness working in UE4 I was having some problems getting the translucency to play ball. In the end I split the mesh to use two different materials; one for the metal parts (opaque) and one for the glass (translucent) parts. Having finally sorted the issues out I made a material that would make the emissive map flicker like a faulty light. From there I duplicated the material a couple of times and changed the time parameters to create variations of the flickering material so that I could have different hanging lights flickering differently. At the moment I have three variations but it would be very easy to create more! Below is a screenshot of the normal lights (no flickering) and video of how the different flickering lights look inside UE4. 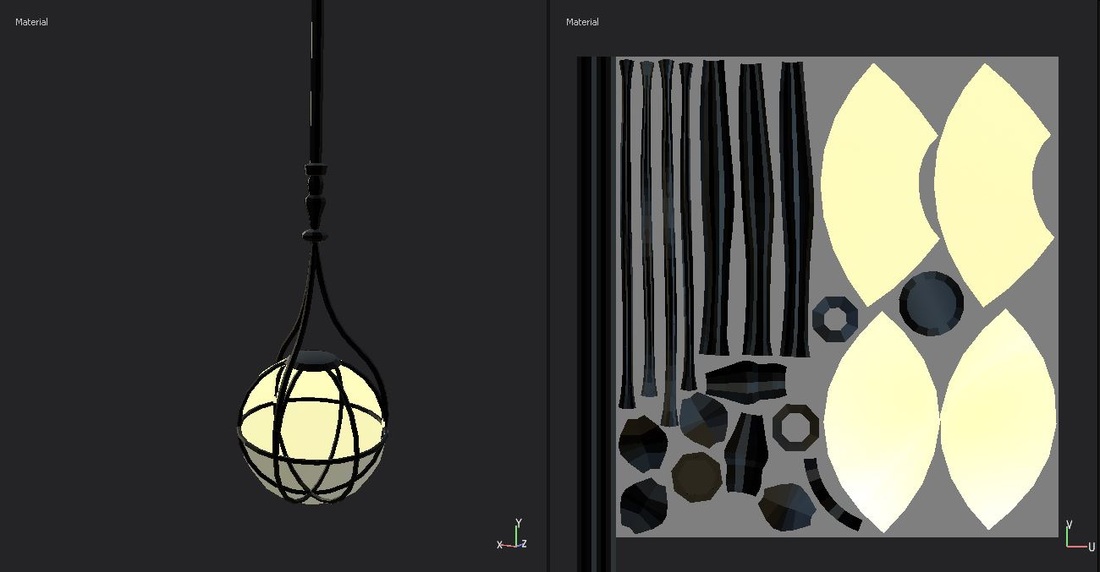 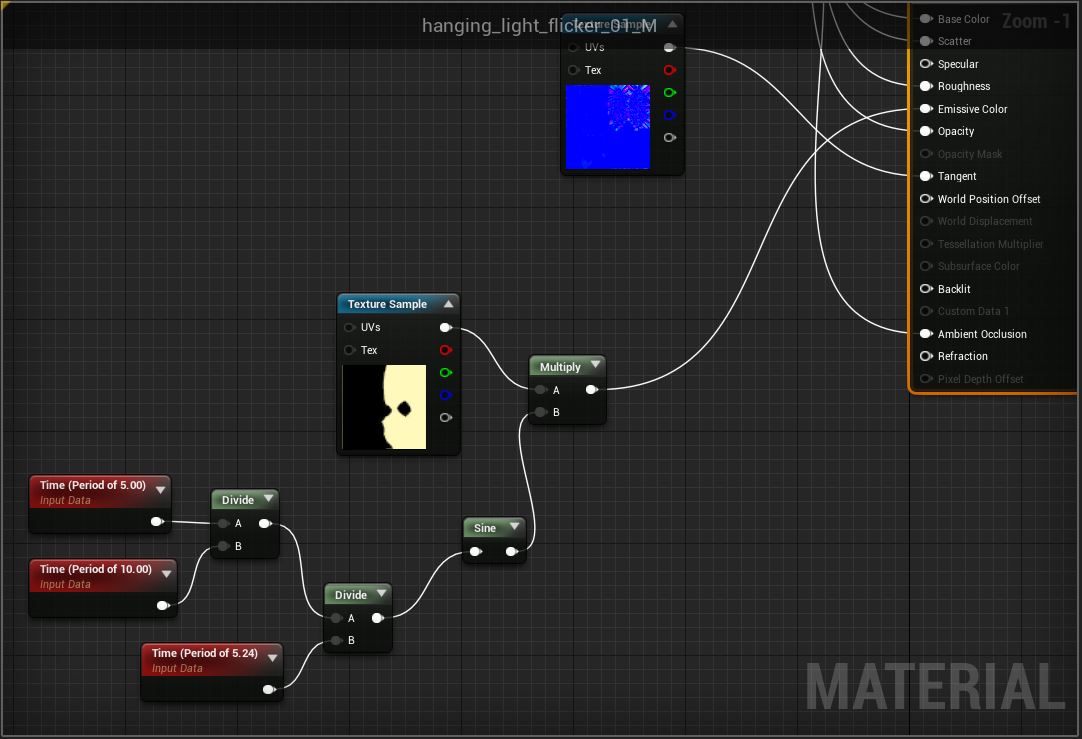 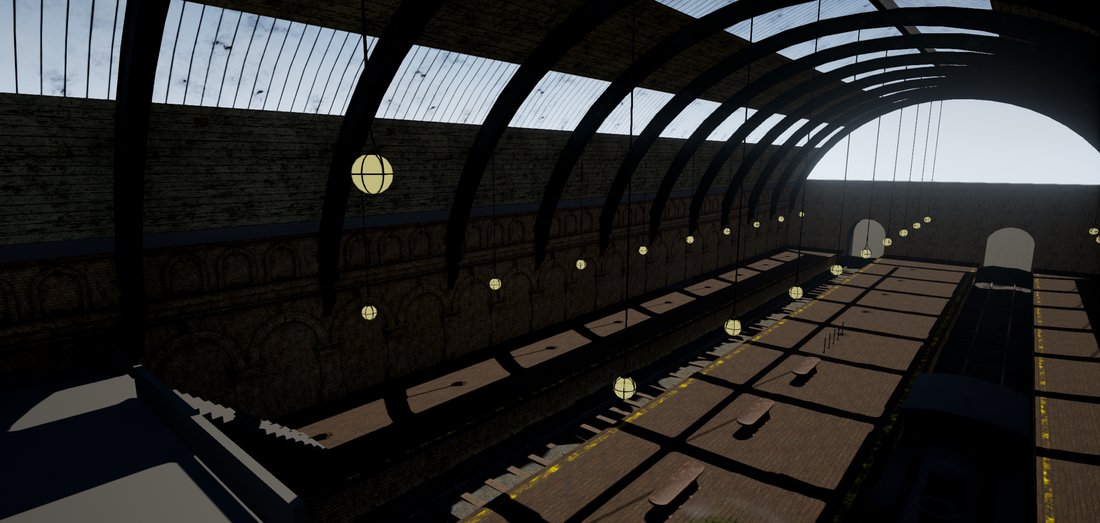 I've now completed the high poly version of the steam train exterior! Although it's not actually that high poly it needs to be baked onto a lower resolution model (basically the same model but minus all of the bolts and small details) due to the number of bolts and other small details that take the model from approx. 30,000 tri's up to approx. 95,000 tri's. All that's left to model now is the interior of the cab and then I can start the arduous job of unwrapping. 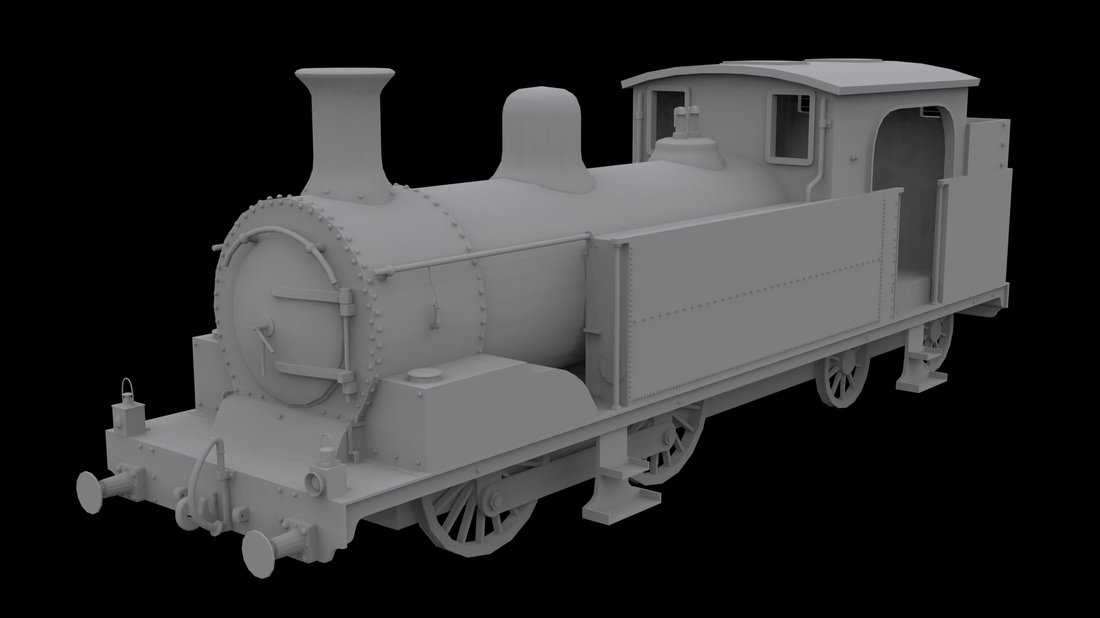 I decided that the ivy looked too bright and happy so I made the texture darker and gloomier. 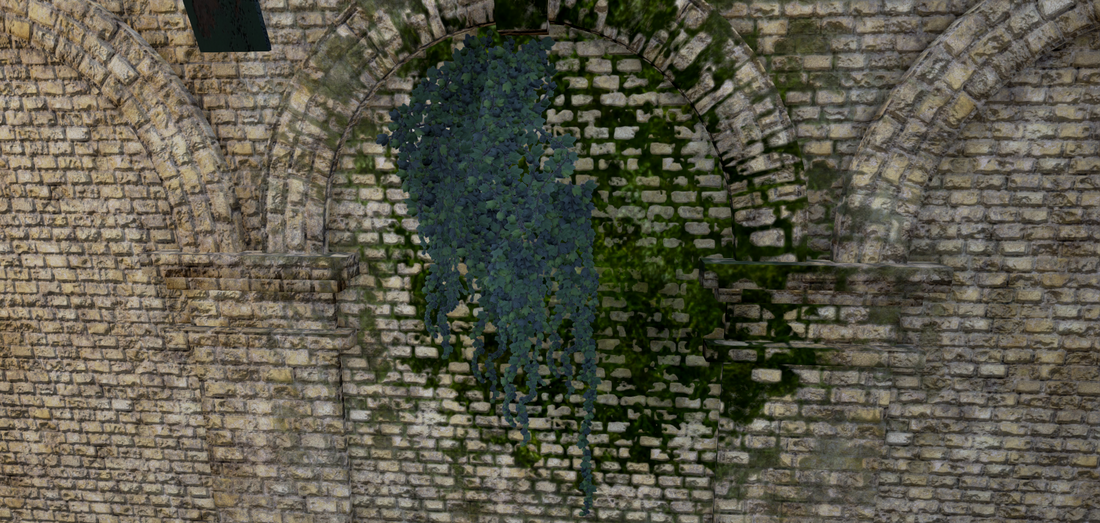 I've created some more foliage for my scene too in the form of a scruffy looking fern. I tried to vary the size and angles of the leaves as much as possible to make it look completely unsymmetrical and random. Using vertex painting inside 3ds Max I painted the areas onto the leaves that wanted to be static and not affected by wind for when I added movement to the asset inside UE4. Once inside UE4 I created a material for the fern that utilised the SimpleGrassWind node combined with my vertex painting from 3ds Max that would make the fern sway a little bit (with the bottoms of each leaf staying static due to my vertex painting). 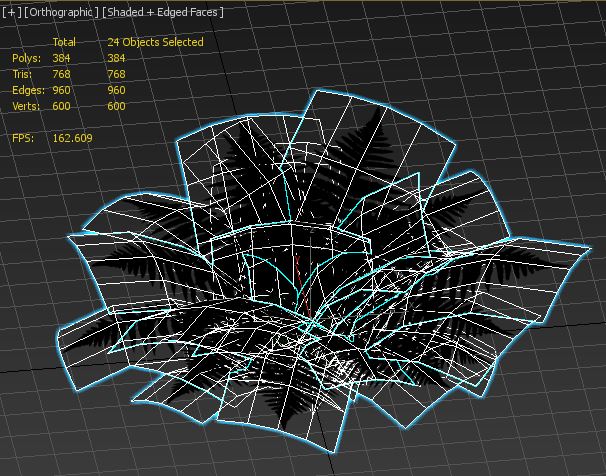 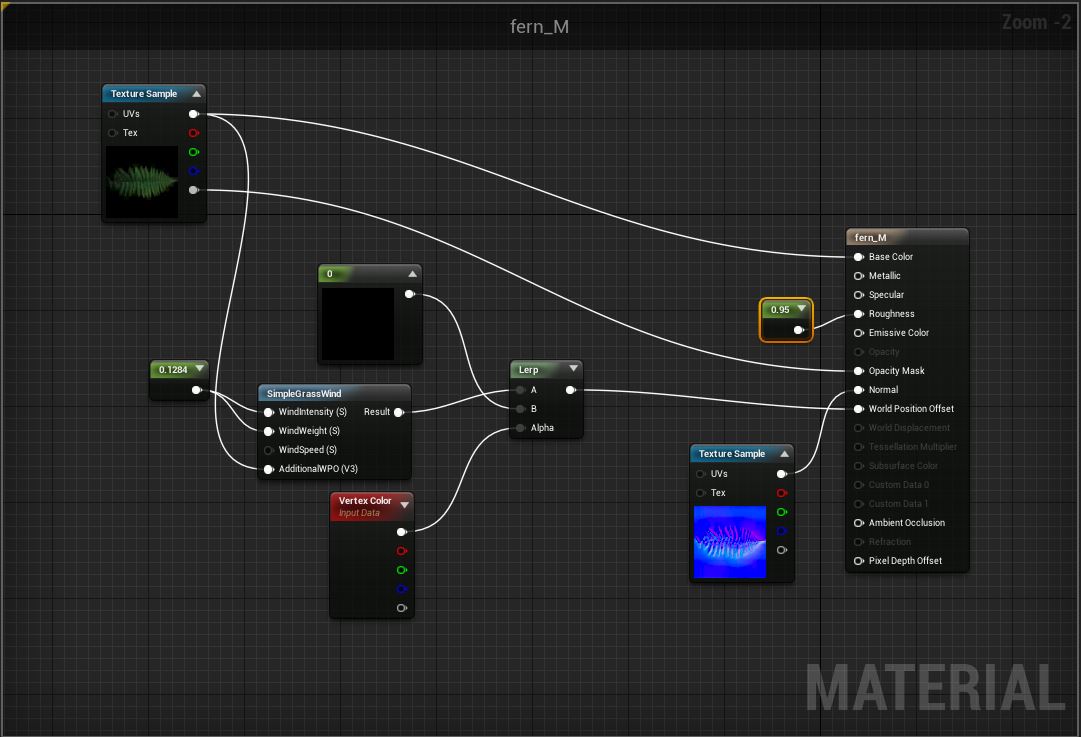 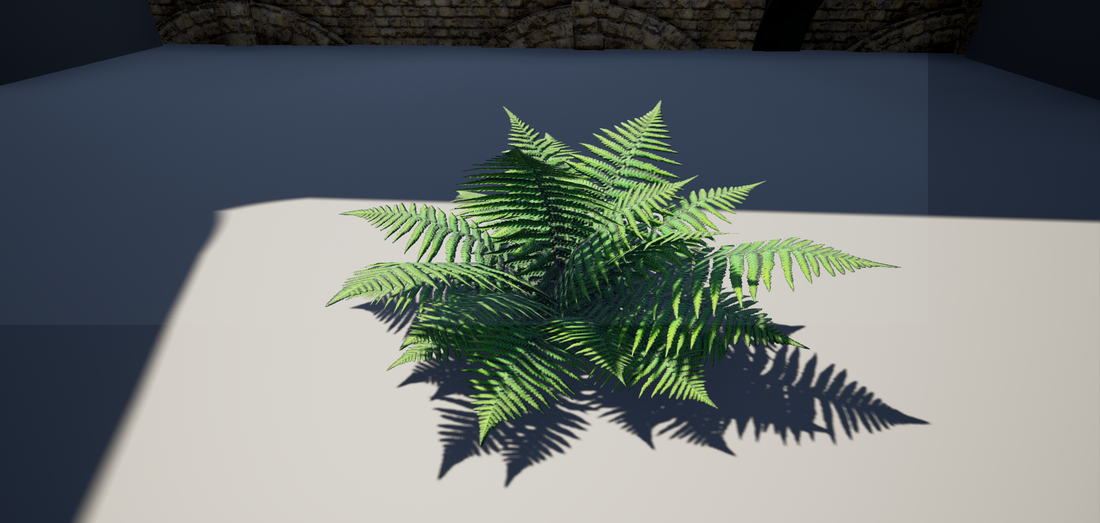 After getting some feedback on my new wood planks texture for the platforms the general consensus was that the wood looked too damaged. It makes sense as if anything the wood would be quite smooth where people have walked all over it. There was also a lot of chipped areas on the planks before which in reality would probably not get there unless someone was deliberately trying to damage the wood. Hopefully I won't have to alter this texture again but by going through the process of changing it multiple times I feel I've gained a greater understanding of how materials should be and that each chip etc. has a reason behind it. 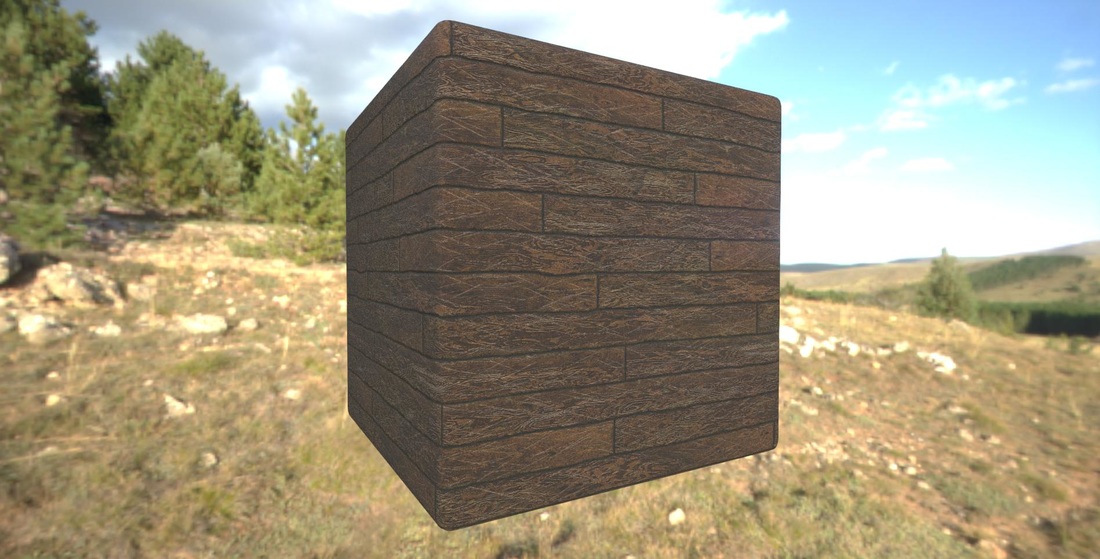 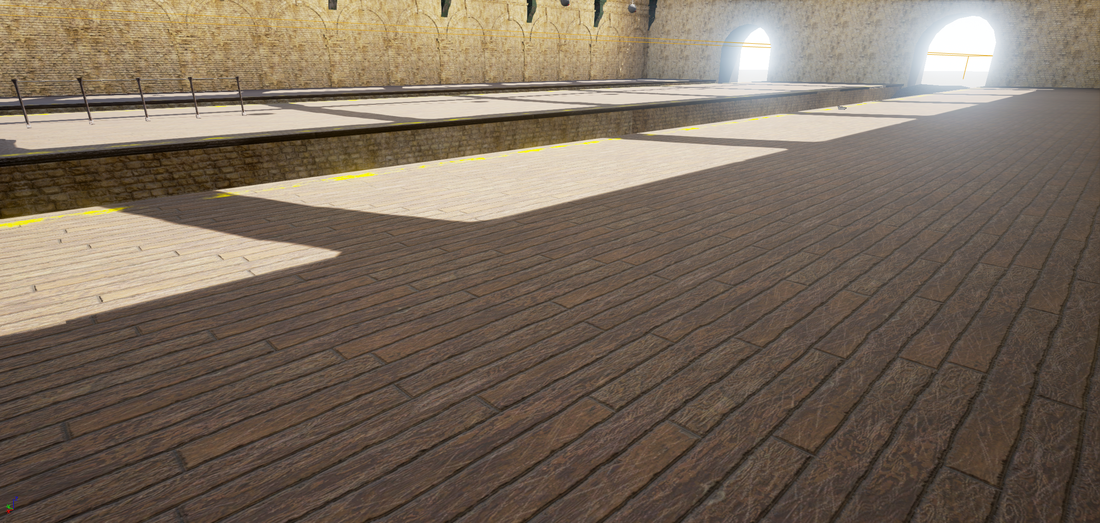 Finally.... I was thinking of different ways to make my level more interactive for players and came up with a few ideas:
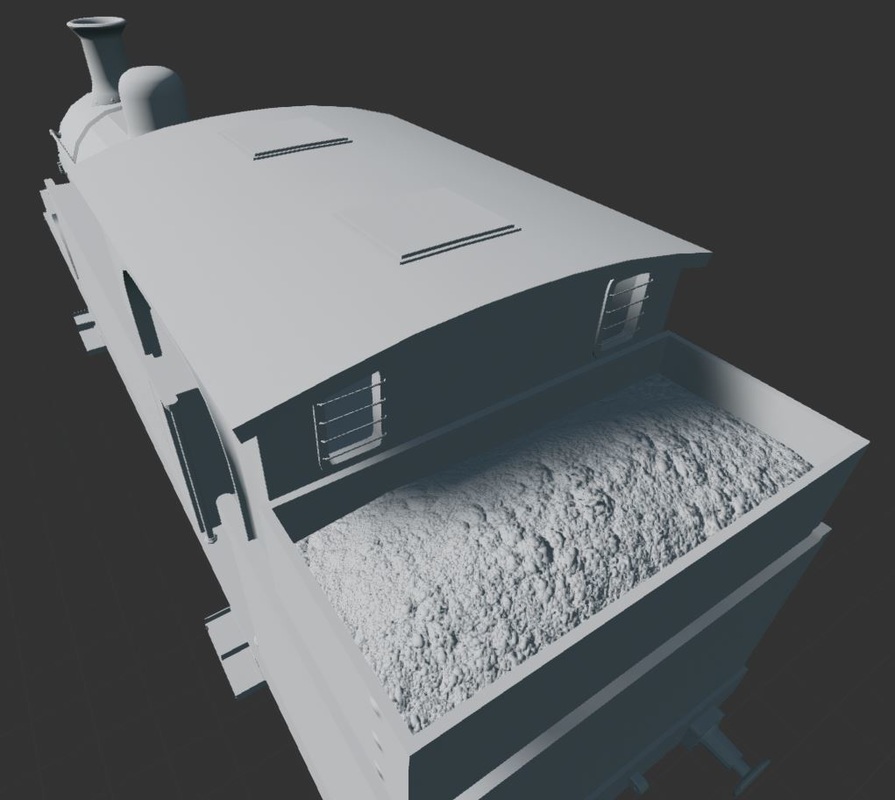
Even though the image I used is not great as it's been taken from an ancient Call of Duty or Medal of Honor game it does a great job of representing what how the playable game would look if I did implement these ideas. I'd only have to make the rifle and one hand/bit of arm as the other hand would be hidden, so it wouldn't be too much extra work create just the FPS WW1 soldier aspect. 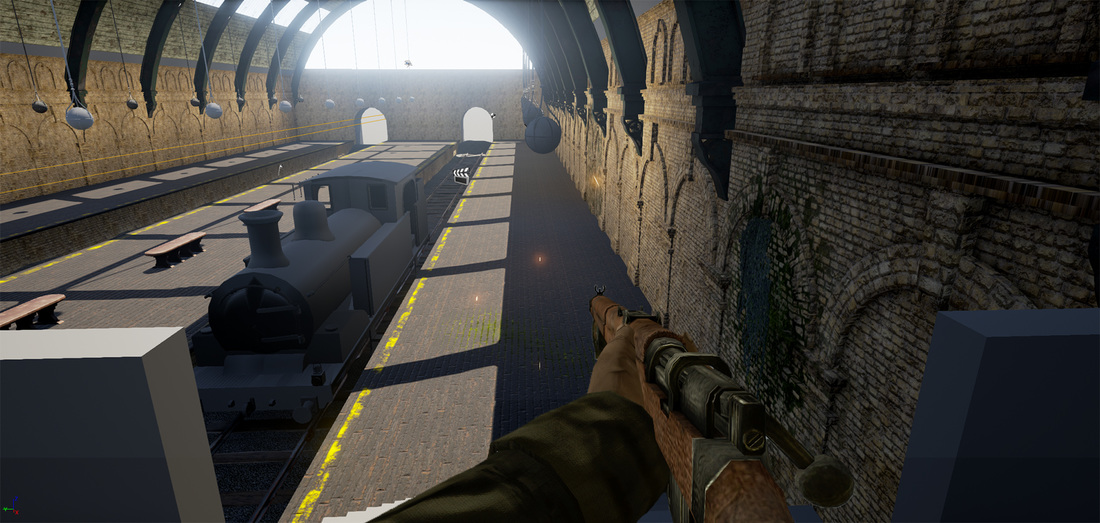 Over the past week I've been working on the steam train! I've been modelling based upon my reference images from the London Transport Museum and a number of images I've collected on my Pinterest board. I'm pleased so far with my progress and the wheels snap onto the tracks in my UE4 scene. I'm also thinking about modelling the cab (the cockpit part of the train where the driver does) so that the train can be entered and the player can see all of the pipes/furnace/levers etc. I think that doing this will be quite a challenge as it will be quite complicated to model but I think that it will definitely pay off in terms of attention to detail. Once I've finished modelling the train I plan to start on the carriage and then unwrapping/texturing. 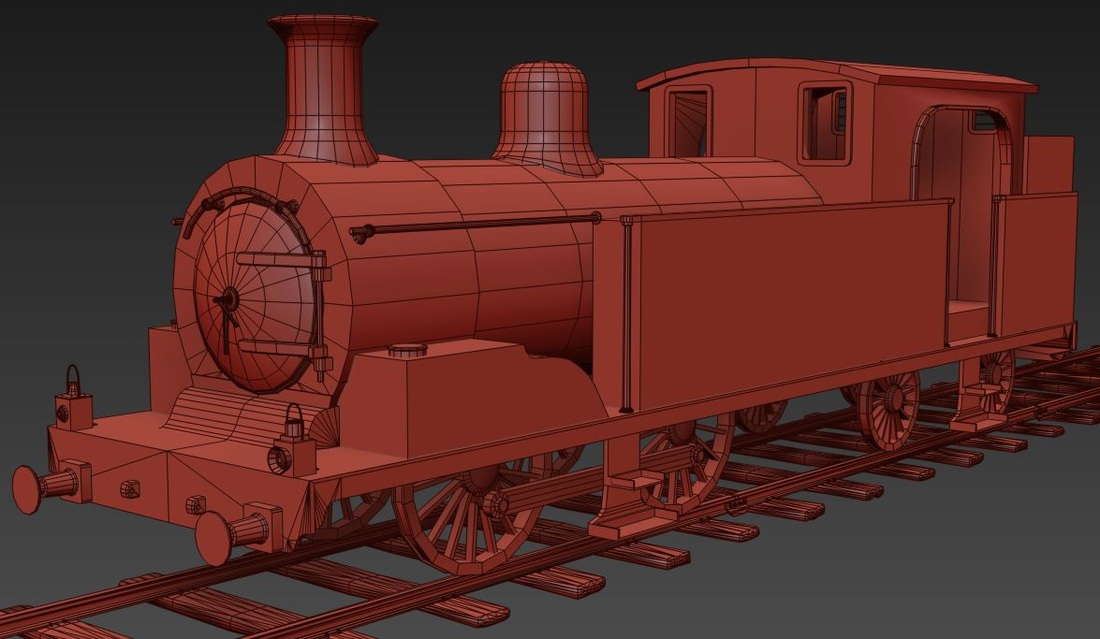 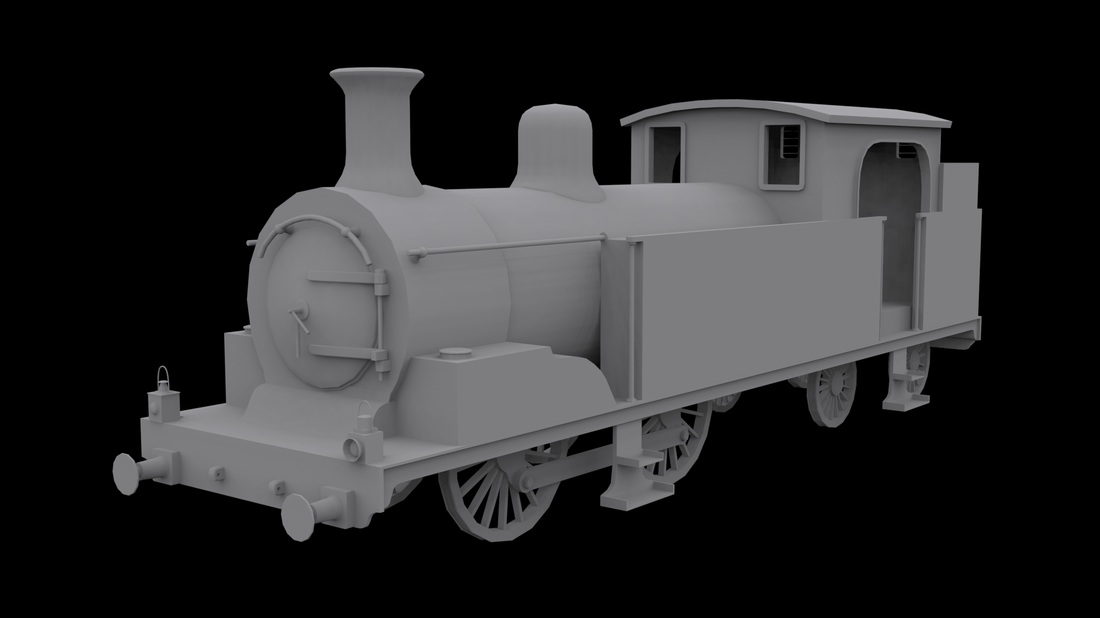  |

Ryan GavegliaThird Year Games Art Student at the University of Northampton interested in Environment Art. Archives
April 2017
|